OpenAI Agents SDK Tutorial: Build a Research Agent That Actually Works with Responses API and MCP
Learn how to build a practical research agent with OpenAI Agents SDK, Responses API, and Hosted MCP Tool. This guide focuses on architecture, approvals, and tool boundaries instead of toy demos.
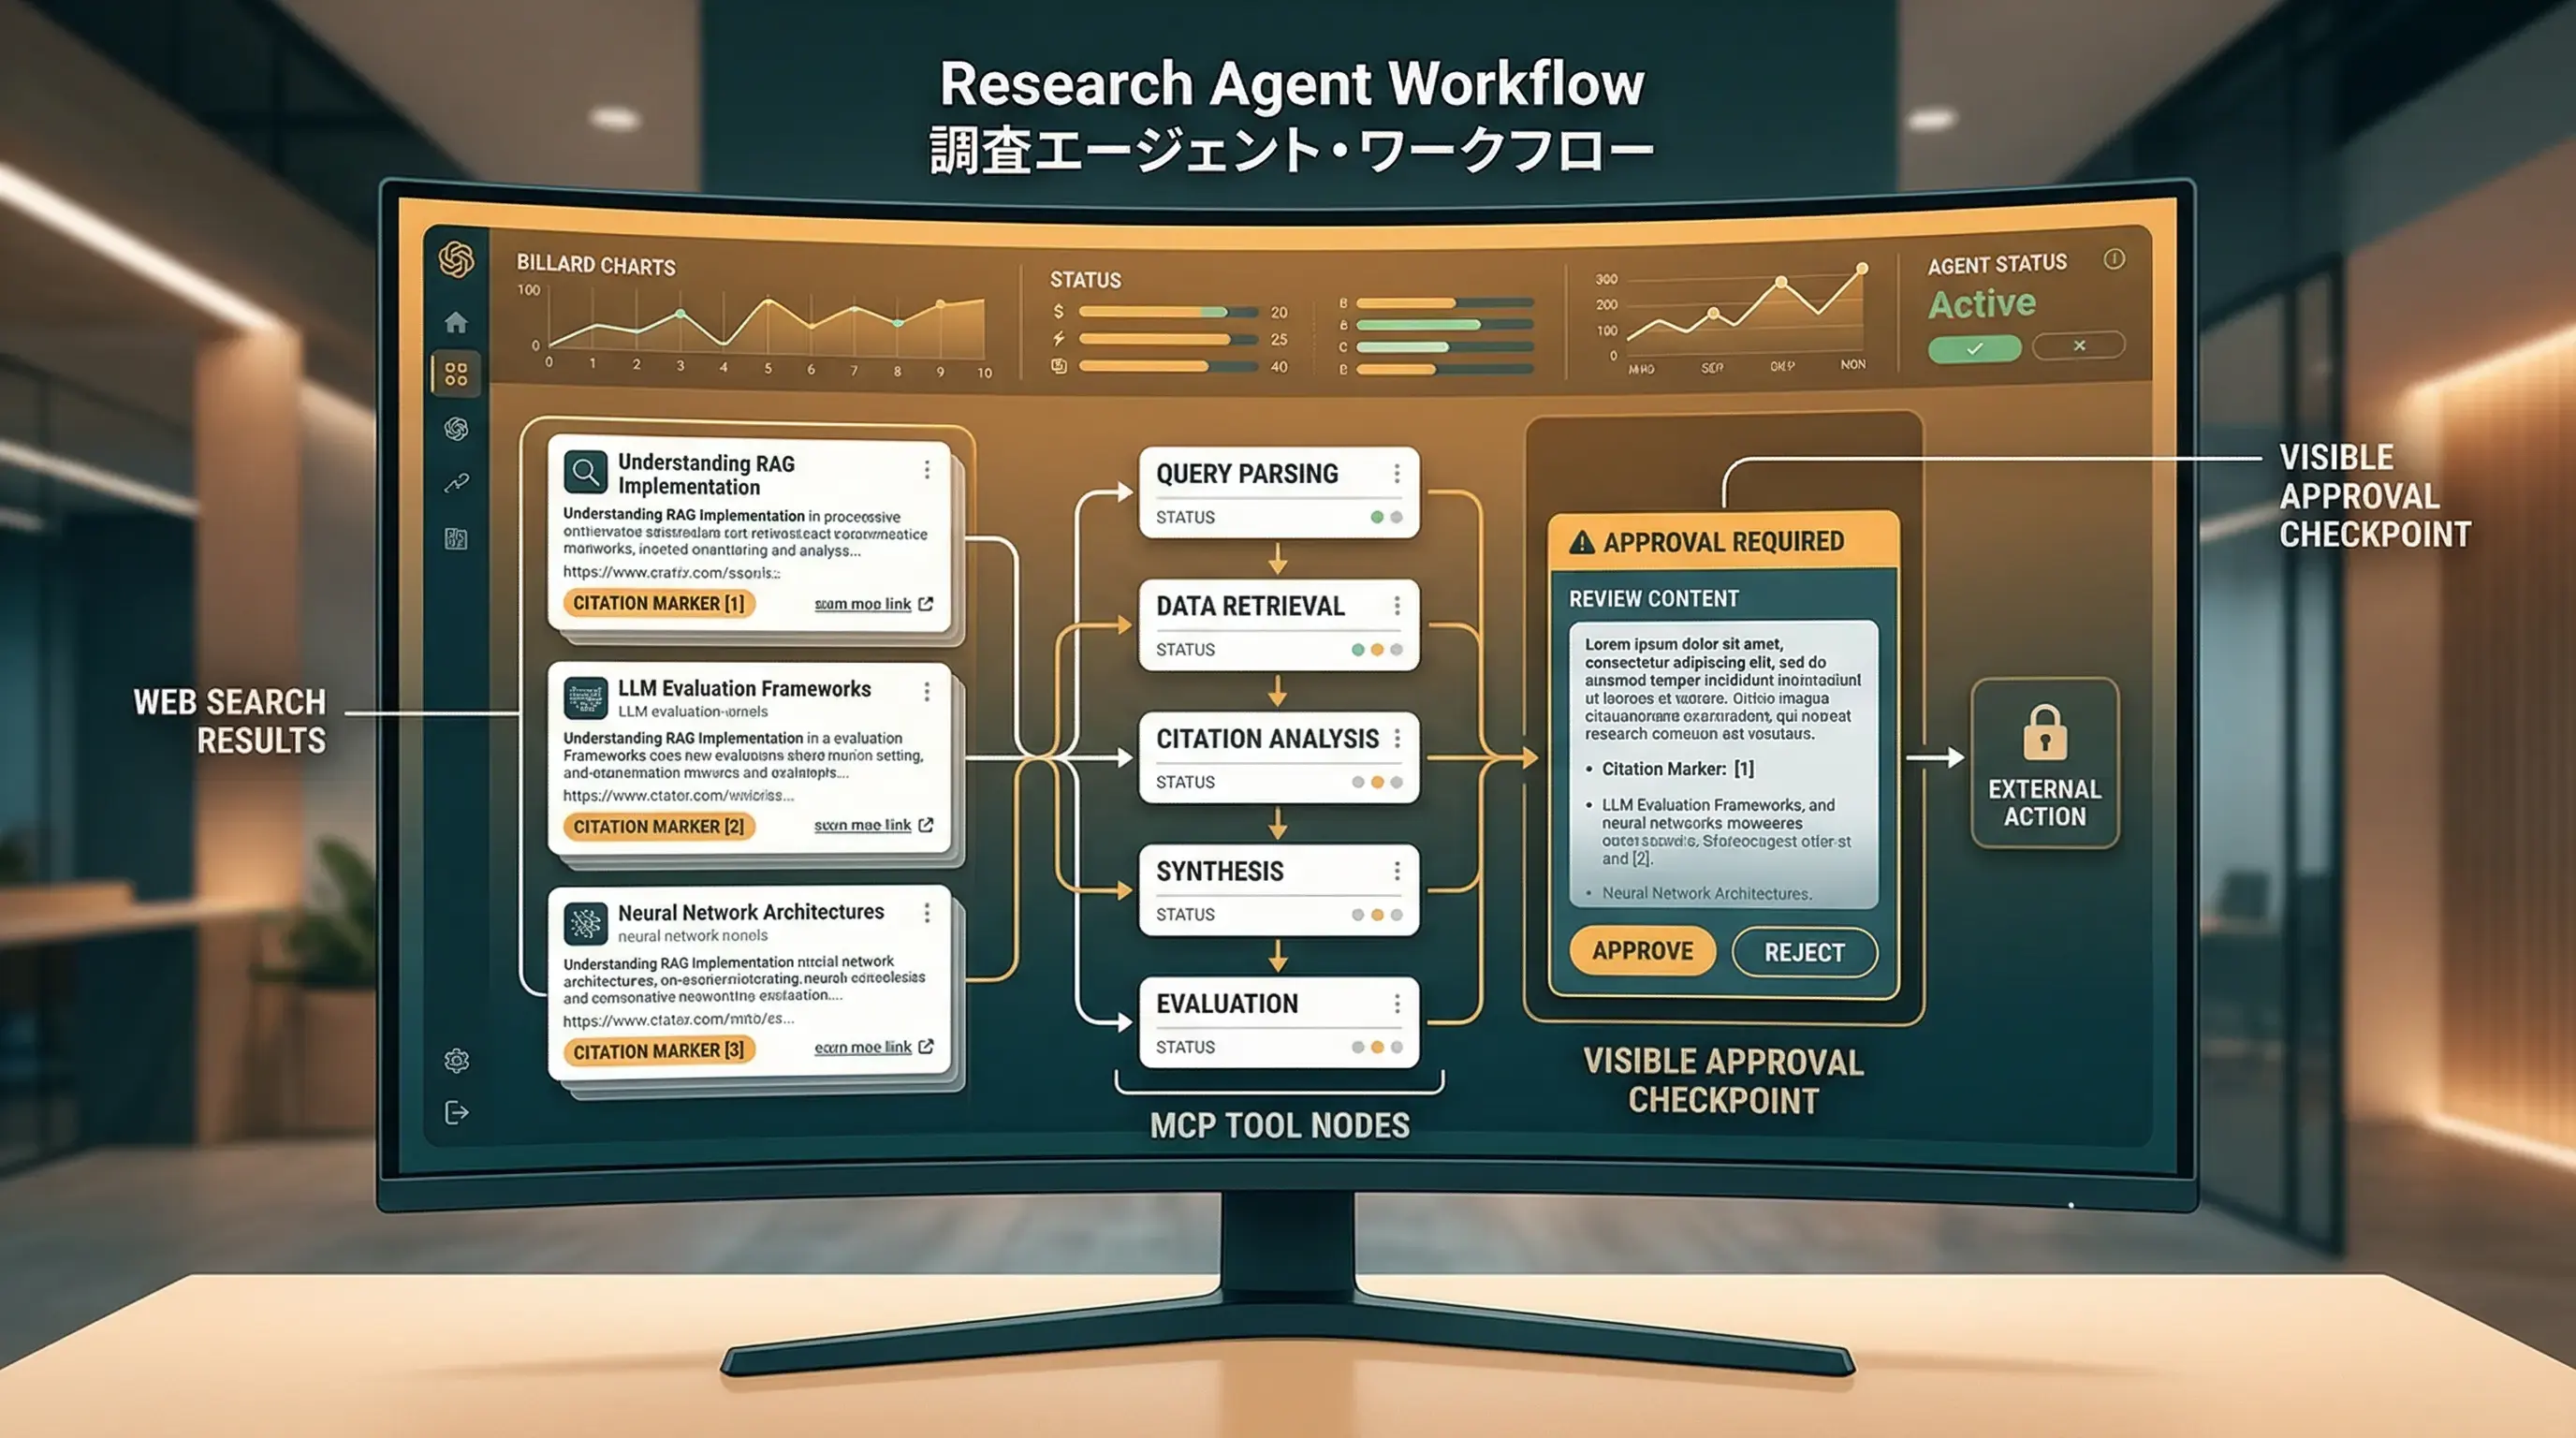
A lot of agent tutorials stop here:
agent = Agent(name="assistant", instructions="You are helpful")That code runs. It just does not get you very far. The hard part of a research agent is not creating an Agent() object. The hard part is making three things work together without turning the whole system into a mess: current information, external tools, and permission boundaries.
That is the gap this guide is trying to close. We will use stable pieces from OpenAI’s official docs and wire them together in a way that makes sense for real work: Agents SDK for orchestration, Responses API for model turns and hosted tools, and MCP for external capabilities. Once those roles are clear, the workflow gets a lot easier to reason about.
What You Will Learn
- When to use Agents SDK and when to drop down to the Responses API
- How to start with web search before you touch external systems
- How to attach a Hosted MCP tool without giving up control
- How to think about approvals, tool filtering, and safety from day one
Read time: 10 minutes
Difficulty: Intermediate
First, Separate the Three Layers
If you treat Agents SDK, Responses API, and MCP as one blurry thing, the design usually falls apart a few steps later. A cleaner mental model looks like this:
- Responses API handles model turns, tool configuration, and hosted capabilities such as Web Search, File Search, and hosted MCP.
- Agents SDK handles the agent loop, handoffs, guardrails, traces, and multi-step execution.
- MCP is the protocol layer. It standardizes how hosts, clients, and servers exchange tools and context over JSON-RPC.
The MCP spec also matters because it does not reduce everything to “a tool call.” Servers can expose tools, resources, and prompts. That distinction is useful in practice. Some information should be exposed as context, not as an action. Some workflows belong in prompts, not in tool schemas.
Set Up the Environment
The official Quickstart keeps the setup simple:
python -m venv .venv
source .venv/bin/activate
pip install openai-agents openai
export OPENAI_API_KEY="sk-..."
If you plan to talk to a remote MCP server, prepare two more things before you write any orchestration code:
- a trusted MCP server URL
- an OAuth access token if the service requires authentication
That word, trusted, matters. OpenAI’s MCP guide is clear about the risk here. A remote MCP server may see data from the model context, so treating any public server as safe by default is a bad habit to build.
Step 1: Start with a Research Agent That Can See the Live Web
The first layer of a research workflow is not a database and it is not a multi-agent tree. It is the ability to fetch current information. If that layer is missing, the rest of the system just moves stale assumptions around more efficiently.
The Agents SDK already gives you a clean place to start with WebSearchTool():
import asyncio
from agents import Agent, Runner, WebSearchTool

research_agent = Agent(
    name="Research Agent",
    model="gpt-5.4",
    instructions=(
        "You are a research assistant. "
        "Use web search for current facts, cite sources clearly, "
        "and separate confirmed facts from open questions."
    ),
    tools=[WebSearchTool()],
)

async def main():
    result = await Runner.run(
        research_agent,
        "Summarize the latest MCP adoption patterns for developer tools.",
    )
    print(result.final_output)

if __name__ == "__main__":
    asyncio.run(main())
What I like about this starting point is not just that it can search. It keeps responsibilities clean. The model knows it has access to the web, and the Responses layer can surface citations and web_search_call items that show what happened during the turn. That gives you something concrete to inspect when the output looks off.
The web search guide also makes an important distinction between deep research, agentic search with reasoning, and non-reasoning web search. That is not just product language. It is a latency and cost decision. Fast lookups do not need the same search behavior as long-form research runs.
Step 2: Add External Capabilities, But Keep Approvals Tight
This is where a lot of demos go off the rails. The first instinct is to connect everything at once: GitHub, Dropbox, calendar data, payments, internal docs. In practice, it is better to ask a narrower question first: what capability is still missing after web search?
If the answer is a public, remotely reachable tool surface, the current Agents SDK supports HostedMCPTool. That pushes the tool round-trip into OpenAI’s hosted infrastructure instead of making your Python process manage tool listing and invocation by hand.
import asyncio
from agents import Agent, HostedMCPTool, Runner, WebSearchTool

agent = Agent(
    name="Repository Researcher",
    model="gpt-5.4",
    instructions=(
        "Research software projects. "
        "Use web search for public context, then use MCP when repo-level facts are needed."
    ),
    tools=[
        WebSearchTool(),
        HostedMCPTool(
            tool_config={
                "type": "mcp",
                "server_label": "gitmcp",
                "server_url": "https://gitmcp.io/openai/codex",
                "require_approval": "always",
            }
        ),
    ],
)

async def main():
    result = await Runner.run(
        agent,
        "Find the main language and major folders in the OpenAI Codex repository.",
    )
    print(result.final_output)

if __name__ == "__main__":
    asyncio.run(main())
I set require_approval to always on purpose. Research agents have a habit of starting with harmless discovery and drifting into action once you attach richer tools. If you do not put an approval gate in early, you usually end up adding one only after the workflow has already become hard to audit.
OpenAI’s MCP and Connectors guide also explains what you should expect to see in the output stream: mcp_list_tools when tool definitions are imported, mcp_call when a tool is invoked, and mcp_approval_request when a human decision is required. That visibility matters. It lets you separate “the model saw these tools” from “the model then used them.”
Step 3: Learn What MCP Is Actually Buying You
It is easy to reduce MCP to a fancy server_url field. That misses the point.
The useful part of MCP is that it gives hosts and servers a common protocol for tools and context. The spec defines hosts, clients, and servers as separate roles, and it supports multiple transports such as stdio and Streamable HTTP. That means the same design can move between local and remote surfaces without forcing you to rewrite the entire agent layer.
That is why I recommend choosing the integration style based on where execution should happen:
- Use HostedMCPTool when you want the Responses API to call a public remote MCP server on the model’s behalf.
- Use local MCP transports like
MCPServerStdio,MCPServerSse, orMCPServerStreamableHttpwhen the tool surface belongs in your own environment. - Use tool filtering early if the server exposes too much.
That last point is worth stressing. If an MCP server exposes dozens of functions, giving all of them to the model up front is usually a mistake. It increases latency, cost, and confusion all at once.
Step 4: Treat Safety and Cost as Product Features
Once an agent can search the web and touch external systems, the real engineering work begins. This is where approval flows and guardrails stop being optional polish and become part of the architecture.
The Guardrails guide makes the execution boundaries clear:
input_guardrailsrun only on the first agent in the chainoutput_guardrailsrun only on the final producing agent- if you need checks around every custom function tool call, use tool guardrails
That detail trips people up all the time. They attach an input guardrail and assume the whole multi-agent flow is covered. It is not. If your system includes a manager, specialists, handoffs, or nested tools, you often need the safety checks closer to the tool layer.
For a research workflow, I would start with three rules:
- Web search is for discovery, not for sensitive actions.
- MCP tools require approval by default, at least until you trust specific tools.
- Large tool surfaces should be narrowed with
allowed_toolsor tool search.
That may feel conservative, but it saves time later. The earlier you draw the line around permissions, the less likely you are to end up with an agent that quietly expands from “summarize” into “take action.”
Common Problems and Fixes
Problem 1: More tools made the agent slower, not better
Fix: Stop exposing the entire surface at once. OpenAI’s docs on tools and the SDK docs both point to tool search and deferred loading for a reason. If the model does not need every tool schema on every turn, do not pay that token cost.
Problem 2: The MCP server connects, but the model keeps choosing the wrong tool
Fix: Start with naming and descriptions before you blame the model. Poor server_label, weak descriptions, and vague instructions are common causes. If needed, narrow the set further with allowed_tools so the model learns the right decision in a smaller space.
Problem 3: The guardrail exists, but it did not catch the risky behavior
Fix: Check whether you attached an agent guardrail or a tool guardrail. Agent guardrails only see the first or last stage of the chain. Tool guardrails are the ones that follow custom function-tool execution.
Three Practical Upgrades After the First Version
1. Split research from action
Let search answer what is happening now. Let MCP answer whether the agent should act on another system. Keeping those concerns separate makes traces much easier to read.
2. Keep replayable state
The Quickstart points to result.to_input_list(), sessions, and previous_response_id for continuing a run. In a research workflow, that is not just chat memory. It is part of building an audit trail you can replay.
3. Prefer official or self-controlled MCP servers
This is not just caution for its own sake. OpenAI explicitly recommends official servers hosted by the service providers themselves when possible. Research agents often cross system boundaries, which makes trust even more important than in a toy demo.
Conclusion
If all you need is a demo, you can throw a prompt and a few tools into one file and get something interesting back. If you want a research workflow that a team can live with, you need cleaner boundaries: one layer for orchestration, one for tool execution, and one for permission control.
That is what Agents SDK, Responses API, and MCP give you when you use them for the jobs they were designed to do. The hard part is not a missing feature. It is resisting the urge to collapse everything into one magical agent object.
If you want to review MCP fundamentals before building this stack, these two related posts are a good next stop:
- MCP Practical Guide: Build Reliable AI Agent Workflows with Model Context Protocol
- Build Autonomous AI Agents from Scratch in 2026: Complete Hands-On Guide
Sources
Reader Dispatches
No reader responses yet. Share your technical perspective below.
Related Posts
Build Autonomous AI Agents from Scratch in 2026: Complete Practical Guide
Detailed tutorial on building real autonomous AI agents from scratch in 2026, including framework selection, tool integration, multi-step reasoning implementation, and production deployment best practices.
What Can OpenClaw Actually Do? 6 Practical Use Cases That Make Sense
This bilingual guide breaks down six practical OpenClaw use cases, from messaging-based personal assistance and browser automation to workspace editing, local exec, heartbeat checks, and precise cron workflows.
MCP Practical Guide: Building Reliable AI Agent Workflows with Model Context Protocol in 2026
Learn MCP from scratch — build standardized AI Agent tool integrations with complete code examples, architecture design, and best practices.